Wednesday, May 13, 2009
All My Tuts Bundled
Photobucket


I've been asked several times over the last year to package up my tuts into word format so here they are. There are 63 psp and 23 photoshop tutorials, all with clear pictures and easy to follow instructions. Sometimes, it's just easier to follow a tutorial when it's sitting beside you rather than flipping back and forth to a page on the net. So, if you're interested, you can go to any of my stores and purchase this pack from the links on the right sidebar >>
 
posted by Scrap Stuff by Shawna at 3:20 PM | Permalink | 112 comments
Tuesday, February 24, 2009
Problems with 4Shared
I've been hearing all over the net that people have been getting viruses from downloading things from 4shared. Since ALL of my freebies and tut supplies are hosted at my 4shared account, at this time, I would advise everyone to not download anything from my links untill I can figure out what to do about it. I do not want anyone to be getting any viruses or trojans from any of my links. I will let everyone know when I've figured out what I'm going to be doing.

Sorry for the inconvenience.

Shawna
 
posted by Scrap Stuff by Shawna at 8:36 AM | Permalink | 40 comments
Sunday, November 30, 2008
Jellybeans
Photobucket


Needed: Eye Candy 5 Impact which you can get a free trial Here
Supplies: SK Jellybeans.f1s Download Here
Put this into your EC5 Impact Bevel folder.

1. Open up a 300 by 300 transparent image.

2. Set your foreground and background to black.

3. Click on your Preset Shapes tool on the left and set it to Ellipse.

4. Draw out a slightly oval shape onto your canvas.

Photobucket

5. In the layer palette, right click on Vector 1 and choose Convert to Raster Layer.

6. Right click on your oval shape in the layer palette and choose Duplicate.

7. With your Mover tool selected on the left, move your second oval to the right like in the picture below:

Photobucket

8. Click on your Preset Shapes tool again, leave it at Ellipse and this time draw out a longer more oval shape like in the picture below:

Photobucket

* This oval needs to be the same length as your 2 smaller ovals above it. Try and get it so that it is even with both outter edges of the 2 other shapes. See picture below for the finished shape so you'll know what I mean:

Photobucket

9. After you get your bean shape even and like how it looks, in the layer palette right click on the Vector layer and choose Convert to Raster Layer.
10. Right click on one of the layers in the layer palette and choose Merge, then Merge Visable.

* Now that you have your shape, here's how to colour it.

11. First, hold down your Shift key on your keyboard and hit the d key. This will duplicate our bean shape. Now you can save the original shape somewhere on your computer and close it out. We will be working on the duplicate.

12. Go up to the Selections tab at the top and choose Select All, then back up to the Selections tab and choose Float, then up to the Selections tab again and choose Defloat.

* You should have marching ants all around your black bean shape.

13. Create a new layer over that one by going to the Layers tab at the top, and choose New Raster Layer.

14. Choose a colour for your foreground, I'm using #C00000.

15. Click on your Flood Fill tool on the left, and then click once inside your new blank layer to fill it with red.

16. Go up to the Selections tab and choose Select None.

Photobucket

* You'll notice that you have some ugly black pixels around your jellybean. That's from the original black shape we made. It is on a separate layer under our red bean, so let's delete the black shape, as we don't need it any more.

17. Right click on your black bean shape in the layers palette and choose Delete.

18. Now go up to the Effects tab, then down to Plugins, then find Eye Candy 5 Impact from the flyout, and choose Bevel.

19. Under the User Settings on the left, look for SK Jellybeans and click it once to select it. Then hit the OK button in the top right corner.

Photobucket

And there's your jellybean :)

When making a different colour jellybean other than the red we used here, once you get into the EC5 Impact Bevel and choose the jellybean preset, you will have to click on the Lighting tab at the top. Under Shadow Colour, change it from the dark red that is there now, to a darker shade of whatever colour you chose for your bean. No need to change anything else.

Tube your beans for easy sizing, and if want, use your burn tool at a low setting to shade in small places.

TOU:

If you do this tutorial, your end result is yours to do whatever you wish; give it away as a freebie, use it as part of a kit, or sell it for profit. You may not make this into an action or script to give away as a freebie or to sell for a profit. A mention or a link back here would be appreciated but is not mandatory. Please do not share the supplies or tut through email or any other means. If you are using this or any of my tutorials for your groups or as part of your own tutorial, please post a link to the tut on my blog and let your members download the supplies from my blog for themselves.
 
posted by Scrap Stuff by Shawna at 10:44 PM | Permalink | 58 comments
Sprinkles
Photobucket


Required: EyeCandy 5 Impact which you can get a free trial Here
Supplies: Here

* Place the SK Sprinkles.f1s into wherever your Eye Candy 5 Impact Bevel folder is, and the Line Style into your Styled Lines folder of PSP.

1. Open up a 200 by 200 transparent image.

2. Set your foreground and background to whatever colour you want to use for your sprinkle. I'm going to start off with #F48FAA.

3. Click on your Pen Tool on the left. Create as vector is checked, Segment Type is Line Tool, Line Style is Rounded Ends, Anti-alias is checked and a Width of 17.

4. Drag out a line shape like the one in the picture below:

Photobucket

5. In the Layer Palette, right click on Vector 1 and choose Convert to Raster Layer.

6. Go up to the Effects tab at the top, down to Plugins, then find Eye Candy 5 Impact, and choose Bevel from the flyout.

7. Under the User Settings on the right hand side, look for SK Sprinkles and click it once to select it, then click the OK button.

And there you have your very first sprinkle.

Photobucket

8. Set your foreground and background to some other colour you'd like for another sprinkle. Let's say your going to use a christmas green #2D8F2D.

9. Follow these same steps until you get in the EC5 Impact Bevel part. Choose SK Sprinkles again, but this time, since you are using a different colour than the pink we used previously, you need to change the Shadow Colour under the Lighting tab.
You'll see that it is a medium shade of purple now. That's because we needed a dark shade for the pink we just used. Click the purple square and your colour box will pop up.

Photobucket

10. At the bottom you'll see HTML #AF5B77. Erase those numbers and type in the colour value numbers you've chosen for your next sprinkle, #2D8F2D.

11. See the small dot indicated by the red arrow at the top?. Place your cursor on that dot and move it upward to a dark shade of green, then hit the OK button.

Photobucket

12. Take a look at your green sprinkle preview and see if you like what it looks like. If not, then go back into the shadow colour box and choose a different shade of green.colour box and choose a different green.

13. Click the OK button on the EC Bevel section when you are satisfied.

Photobucket

* You'll notice that I changed the width to 21 and made it shorter for my second sprinkle. Change your settings up for each. Makes for a nice variety. You can also make them slanted, diagonal, vertical ect....... For PSP users, tube them for easy resizing.

TOU:

If you do this tutorial, your end result is yours to do whatever you wish; give it away as a freebie, use it as part of a kit, or sell it for profit. You may not make this into an action or script to give away as a freebie or to sell for a profit. A mention or a link back here would be appreciated but is not mandatory. Please do not share the supplies or tut through email or any other means. If you are using this or any of my tutorials for your groups or as part of your own tutorial, please post a link to the tut on my blog and let your members download the supplies from my blog for themselves.
 
posted by Scrap Stuff by Shawna at 10:33 PM | Permalink | 17 comments
Candy Sticks
Photobucket


Needed: EyeCandy 5 Impact. Free Trial Here
Supplies Zip: My bevel and glass settings, which you can find Here


1. Open one 600 x 600, and one 400 x 400 transparent canvas.

2. Set your foreground to whatever colour or gradient you want your candy stick to be. I'm going to be using #9FA1FD.

* We first need to make our pattern for our candy, so....

3. Flood fill the 400 x 400 canvas with the colour you chose.

* Now you need to choose a colour for your stripes.

4. I've chosen to use a silky white gradient for my stripes. It's called Snow and you can find it Here

Angle is 40
Repeats are 0
Style is Linear
Set this as both your foreground and background gradient.

5. Click on your Preset Shapes tool on the left and set it to Rectangle.

Anti-alias is checked
Create as Vector is checked
Line Style is solid
Width is 1

6. Drag out across your canvas 1 long rectangle the size you want your stripes to be. Make sure it reaches to the edges of both sides with no spaces. Here's what mine looks like:

Photobucket

7. In the layer palette, right click on Vector 1 and choose Convert to Raster Layer.

* Now, we need to duplicate this strip as many times as needed to fill your canvas up evenly. This will depend on the width you've chosen and on your preference of how many stripes you want. I've got 10 for mine.

8. Right click on your strip layer and choose Duplicate. Then repeat the same step, as many times as needed, each time right clicking on your original stripe to duplicate.

9. Now, with your Mover tool, drag one of the stripes up to the top of your canvas like in the picture below. Make sure it covers the top edge, but doesn't go over.

Photobucket

10. Move the rest of the stripes out evenly like in the image above. Notice that there is a white strip at the very top and it ends with your purple colour at the bottom and does not have a stripe touching the bottom edge. Your canvas should begin with a stripe and end with a colour.

11. Once you have that done, Right click on one of the layers in the palette on the right and choose Merge Visable.

12. Set your new pattern as both your foreground and background pattern in the materials palette.

Angle is 40
Scale is 100

13. Click on the Preset Shapes tool on the left and set it to Rounded Rectangle.

Anti-alias is checked
Create as Vector is checked
Line Style is solid
Width is 1

14. Drag out your candy stick shape onto your canvas. Here's what mine looks like:

Photobucket

15. In the layer palette, right click on Vector 1 and choose Convert to Raster Layer.

16. Go up to the Effects tab, then down to Plugins and find your EyeCandy 5 Impact and choose Bevel. Find SK Candy Stick from the list on the left and click it once to select it, then click the OK button.

** When doing this tut with any colour other than purple, when you are in the EC 5 Imact Bevel section, click on the Lighting tab at the top. Where it says Shadow Colour, you will need to click on that purple square and change it to a slightly darker shade of the candy stick colour that you chose. Leave everything else the same.

* Your image should look like this:

Photobucket

17. Next, go back up to the Effects tab and to EyeCandy again but this time chose Glass. On the left, look for SK Candy Sticks Shine, click it once to select it, then click the OK button.

* Yours should look like this:

Photobucket

** You can make these any size you want, fat or skinny, with gradients or multi coloured stripes. Experiment and have fun :)

TOU:

If you do this tutorial, your end result is yours to do whatever you wish; give it away as a freebie, use it as part of a kit, or sell it for profit. You may not make this into an action or script to give away as a freebie or to sell for a profit. A mention or a link back here would be appreciated but is not mandatory. Please do not share the supplies or tut through email or any other means. If you are using this or any of my tutorials for your groups or as part of your own tutorial, please post a link to the tut on my blog and let your members download the supplies from my blog for themselves.
 
posted by Scrap Stuff by Shawna at 10:21 PM | Permalink | 13 comments
Chocolate Pops
Photobucket


Supplies: Download Here
Plugin Needed: EyeCandy 5 Imapct Free Trial Here


1. Start by opening up a 400 by 400 transparent image.

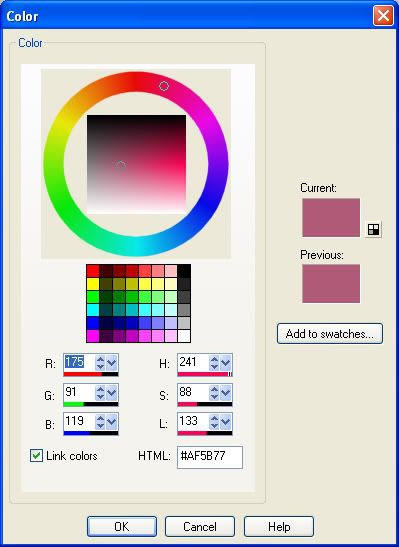
2. Set your foreground and background colour to #7F5026.

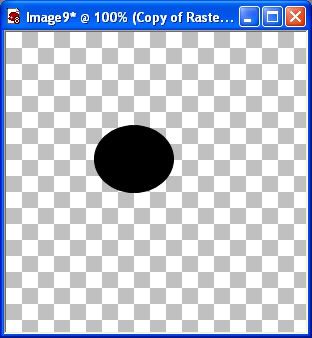
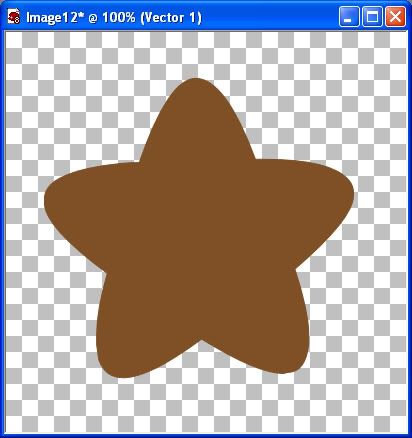
3. Click on your Preset Shapes tool on the left and find SK Fat Baby Star from the list and double click it to select. Anti-alias is checked, Create as Vector is checked, line style is Solid, and a Width of 1.

4. Drag out your shape onto your canvas, about the same size as the one in the picture below:

Photobucket

5. In the layer palette on your right, right click on Vector 1 and choose Convert to Raster Layer.

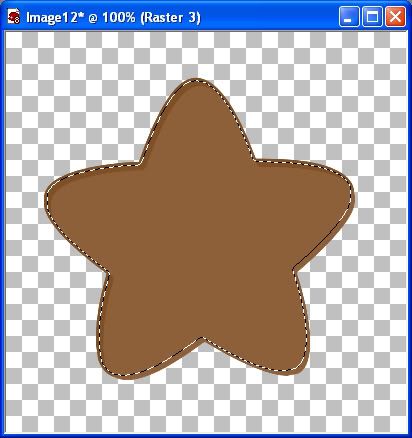
6. Go up to the Selections tab and choose Select All, then up to the Selections tab again and choose Float, then back up to the Selections tab again and choose Defloat.

* You should have the marching ants all around your star.

7. Go up to the Selections tab again, and this time go to Modify then to Contract and in the Number of Pixels section type in 3.

8. Make a new layer by going up to the Layers tab at the top, then to New Raster Layer.

9. Change your foreground colour to #8D5F39 and flood fill your new layer with this colour. (flood fill is the paint bucket on the left)

* What we are going to do here is.... fill the star with a slightly lighter shade of brown. We are going to use part of this second lighter layer as our shadow.

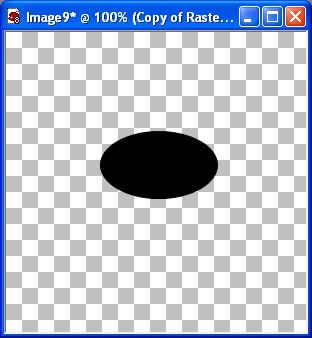
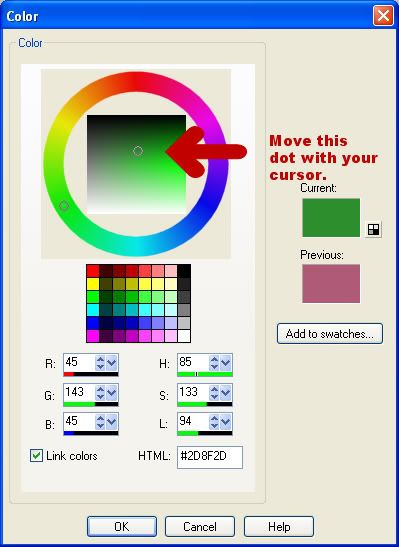
10. Click on your Mover tool on the left. Place your cursor on the lighter brown layer on your canvas and move it to the right and downwards just a bit like in the picture below:

Photobucket

* Your marching ants will stay in place, but the lighter brown that is OUTSIDE of the march ants is going to be our shadow.

Look at the picture below. It shows you how much I've moved my lighter brown layer outside of the marching ants:

Photobucket

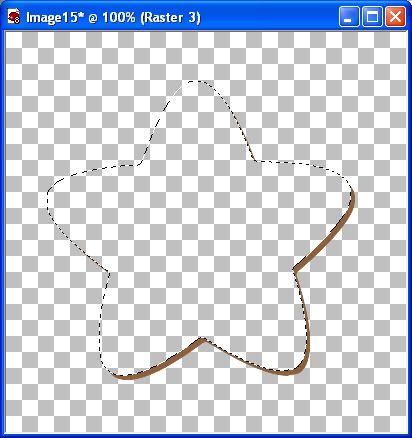
11. Now hit the Delete key on your keyboard. The only thing left of that layer should be the small outter layer of your light brown star.

12. Go up to the Selections tab at the top and choose Select None.

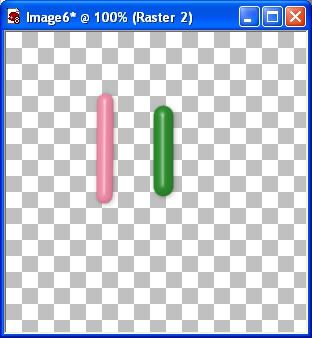
13. Click on your Mover tool and push the thin shadow layer back into place in the star. Because we've contracted the image by 3 pixels, it will be slightly smaller than the darker star, so place it like in the picture below, leaving a bit of darker brown showing around the edges.

Photobucket

14. Go up to the Adjust tab, then down to Blur, then over to Gaussian Blur and set the radius to 2.50

* Now we are going to repeat all those steps again, but this time we are going to use white instead of brown for our highlight.

15. Click on your original brown star layer, and go up to the Selections tab, choose Select All, then Float, then Defloat.

16. Go back up to the Selections tab, choose Modify, then Contract, then set the pixels to 4 this time.

17. Make a new layer by going to the Layer tab, then New Raster Layer, and move it to the top of the pile in the layer palette.

18. Change your foreground colour to White and flood fill this new layer with white.

19. Click on your Mover tool, and move this white layer up and towards the top left. Move this one out a little more than we did for the light brown shadow. We want our highlight to be a little thicker than the shadow was.

Photobucket

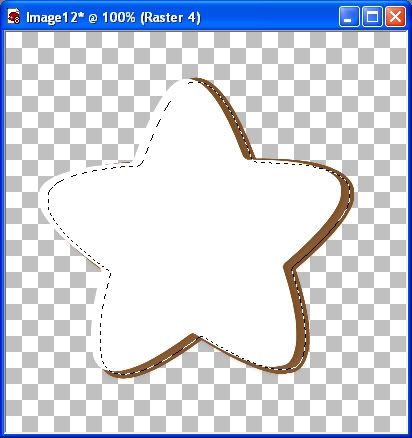
20. Hit the Delete key on your keyboard when you are satisfied with how it looks.

21. Go up to the Selection tab, and choose Select None.

22. With your mover tool, move it back into place inside the brown star.

Photobucket

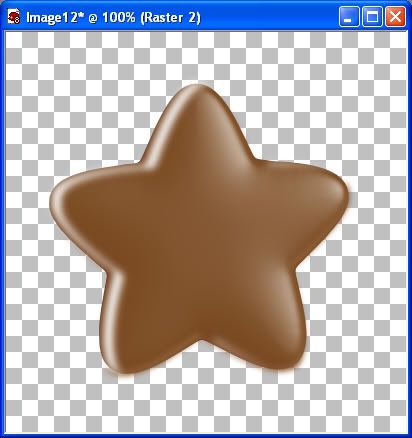
23. Go up to the Adjust tab, then to Blur, then to Gaussian Blur and set the Radius to 3.75. Here's what mine looks like now:

Photobucket

24. Click on your original brown star in the layer palette to make it the active layer.

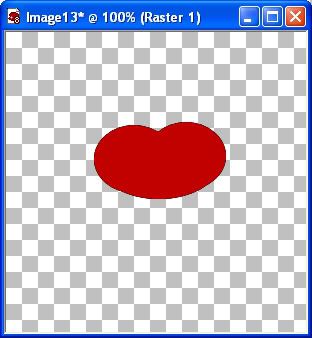
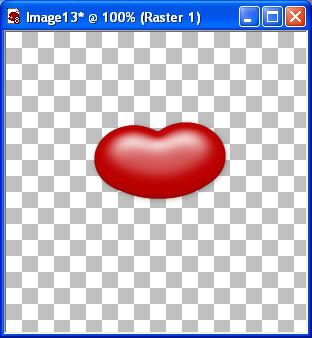
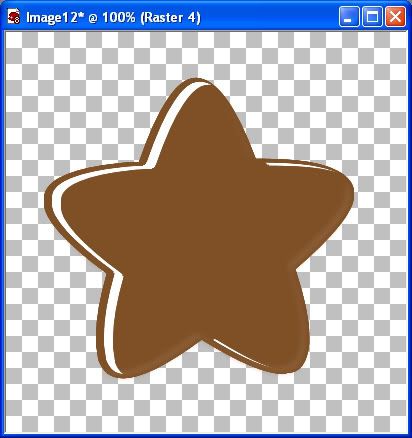
25. Go up to the Effects tab, then down to Plugins, and find Alien Skin Eye Candy 5 Impact and from the flyout choose Bevel.

26. From the User Settings on the left, find SK Chocolate Pop, click it once to select it, then click OK. Here's what mine looks like now:

Photobucket

27. You'll notice from the picture above that we have some blured edges outside of our star. We need to get rid of those so...

28. Click on your original brown star in the layer palette ( if it isn't already selected)

29. Go up to the Selections tab, choose Select All, Float, then Defloat.

30. Go back up to the Selections tab and choose Invert.

31. Now in the layer palette, click once on the white and or brown highlight layer, then hit the Delete key on your keyboard.

32. Next, click once on your thin brown outline layer and then hit Delete on your keyboard.

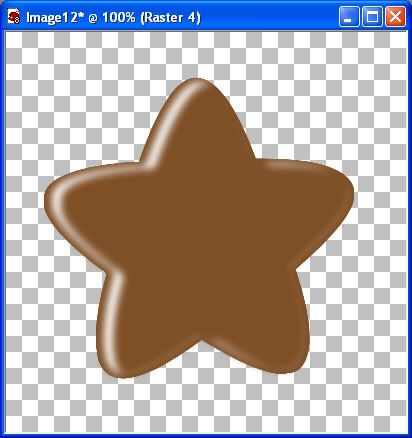
33. Now go up to the Selections tab and choose Select None.
Photobucket

34. Right click on one of the layers and choose Merge, then Merge Visable.

* Now to make the stick for it.... We need to increase the canvas height first...

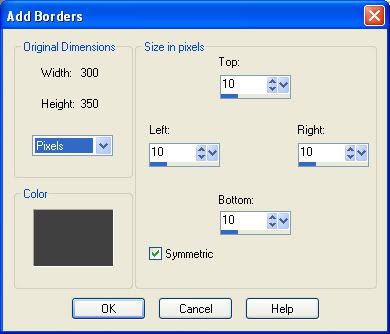
35. Go up to the Image tab, then to Canvas Size. In the New Dimensions section type in 400 width and 700 Height and set it to Pixels.

36. Move your star up so there's room below to make the stick.

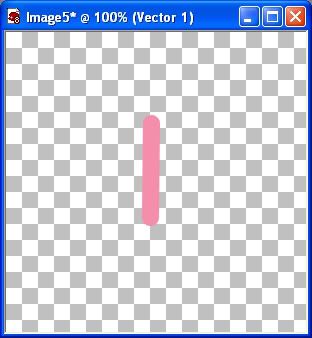
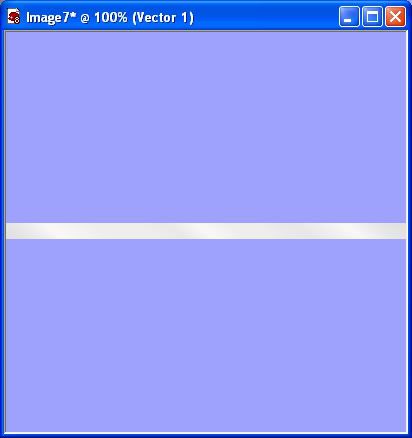
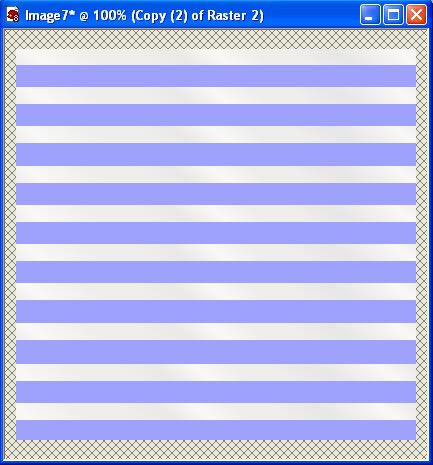
37. Set your foreground to white and click on your Pen tool on the left. Create as Vector is checked, Mode is Draw, Segment Type is Line Segments, Line style is Rounded End, Width of about 13, and Anti-alias is checked.

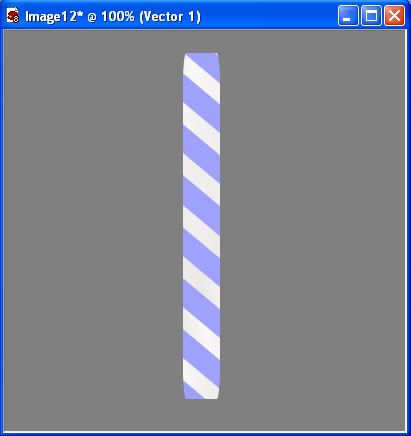
38. Draw out a straight line the length you want your stick to be.

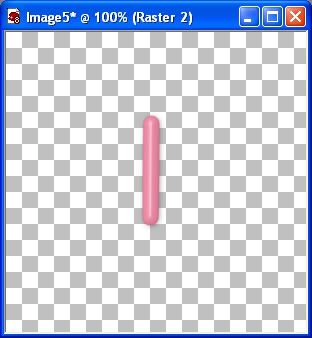
39. In the layer palette, right click on Vector 1 and choose Convert to Raster Layer.

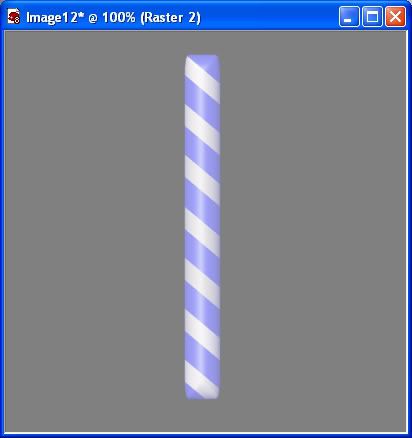
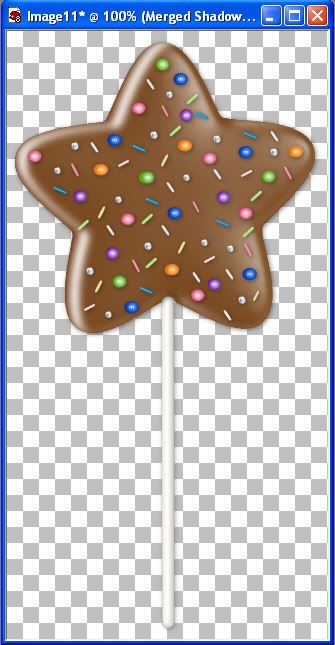
40. Go up to the Effects tab, down to Plugins, then find Alien Skin EyeCandy 5 Impact, then to Bevel. Under the User Settings, find SK Sucker Stick, click it once to select it, then hit OK.

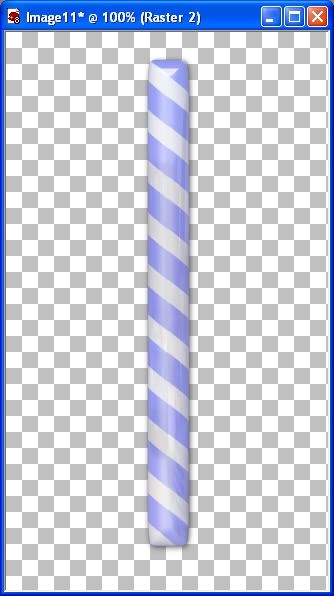
41. Move the stick behind the star layer in the palette.

42. Right click on one of the layers and choose Merge, then Merge Visable. Decorate with the candy of your choice.


Photobucket

TOU:

If you do this tutorial, your end result is yours to do whatever you wish; give it away as a freebie, use it as part of a kit, or sell it for profit. You may not make this into an action or script to give away as a freebie or to sell for a profit. A mention or a link back here would be appreciated but is not mandatory. Please do not share the supplies or tut through email or any other means. If you are using this or any of my tutorials for your groups or as part of your own tutorial, please post a link to the tut on my blog and let your members download the supplies from my blog for themselves.
 
posted by Scrap Stuff by Shawna at 9:48 PM | Permalink | 22 comments
Wednesday, November 26, 2008
Christmas Frame
Photobucket


Supplies: Download Here

Needed: Simple filter 4 way average. Get it Here Click on the photo icon to download it. Unzip it and copy and place it into the plugins folder wherever you have yours saved on your computer.


1. Open up a new transparent image about 400 pixels wide by 450 pixels long.

* This will be the size of your picture you are going to insert later on. You can make this any size you want when redoing this tutorial, but for now, keep to the same size I'm using.

2. Open up from the supplies folder one of the swatches. I'm going to be using SK Christmas Frame 02. Set it as your foreground pattern, Angle 0, and Scale 100.

3. Go up to the Image tab and choose Add Borders.

* You might get a popup message saying something like the image must be flattened into a single background layer. Click OK.

4. Change your settings to the same as the picture below. If you colour swatch is white, change that to a darker shade of grey instead. Since our canvas has now been flattened, it has a white middle, so if you add a white border as well, we aren't going to be able to select it with the magic wand later on, so change your colour to some shade of grey.

Photobucket

5. Click on your Magic Wand tool on the left, Mode is replace, Match Mode is RGB Value, Tolerance is 30, Feather is 0, and Anti-alias is checked. Click once on your grey border. You should have marching ants all around your border.

6. Click on your Flood Fill tool on the left and then click once on your grey border to fill it with the stripes from your foreground pattern. You should now have this:

Photobucket

7. Now, go up to the Effects tab, over to 3D Effects, and then to Cutout and use these settings:

Photobucket

8. Go up to the Selections tab and choose Deselect.

* Now to add some small coloured beads.

11. Go up to the Image tab and choose Add Borders. Change you pixles to 2 and your colour to white. Since we have a dark frame, we need a light colour for the border so that it doesn't blend into the frame's colours and we can select it easily with the magic wand.

* You should now have a 2 pixel white border around your canvas.

12. From the supplies folder, choose one of the coloured bead patterns and set it as your background. I'm going to use the gold pattern.

13. Click on your Magic Wand tool on the left and click once on your outter white border to get the marching ants. If you find it hard to see, you can zoom in to make your canvas appear bigger for better viewing.

14. Click on your Flood Fill tool on the left and then click once inside the marching ants to fill it with your bead pattern.

15. Go up to the Selections tab and choose Select None. This is what you should have so far:

Photobucket

16. Next, set your foreground colour to #570101 and your background colour to #8B0B0B.

17. Click on your background swatch again and click the gradient tab. From the gradient dropdown list, find foreground-background and select that. Set it to Linear, Angle at 20 and Repeats at 1.

18. Go up to the Image tab and choose Add Border again. Leave the colour as white but change your pixels to about 20.

19. Click on your Magic Wand tool and then click once on the new 20 pixel white border to select it.

20. Click on your Flood Fill tool on the left and with your RIGHT mouse button, click once inside the marching ants to fill it with your background gradient.

19. Go up to the Effects tab, over to 3D Effects, then to Cutout and use these settings:

Photobucket

20. Repeat step #19 again, but this time change the Opacity to 40.

21. Go to the Selections tab and choose Select None. This is what you should have:

Photobucket

22. Go up to the Image tab and click on Add Border. Change the pixels to 3.

23. Click on your Magic Wand tool on the left and then click once on the white border.

24. Set your foreground to one of the bead patterns, I'm still using the gold.

25. Click on your Flood Fill tool and then click once inside the marching ants to fill it with your beads.

26. Go up to the Selections tab and choose Select None.

27. Click on the Image tab and choose Add Border. Change the pixels to 20.

28. Click on your Magic Wand tool and click once on your white border.

29. Set your foreground pattern to SK Christmas Frame 02, Angle is 0 and Scale is 100.

30. Click on your Flood Fill tool and then click once inside the marching ants to fill it with the diagonal pattern.

31. Go up to the Effects tab, down to Plugins, then find Simple and from the flyout choose 4 way average.

* Your diagonal stripes should have turned into a plaid pattern. See picture below:

Photobucket

32. Go up to the Effects tab, over to 3D Effects and choose Cutout and use the settings below:

Photobucket

33. Go up to the Selections tab and choose Select None. Here's mine so far:

Photobucket

34. Go up to the Image tab and choose Add Border. Change the number of Pixels to 3.

35. Click on your Magic Wand tool, then click once on your white border.

36. Set your coloured beads as your foreground pattern.

37. Click on your Flood Fill tool on the left and then click once inside the marching ants to fill it with your beads. Here's what mine looks like so far:

Photobucket

* We're almost done. Now to get rid of the white middle.

38. In the layer palette, right click on Background and choose Promote Background Layer.

39. Now click on your Magic Wand tool, click once on the white part in the middle of your frame. Marching ants should be all around the white middle square.

40. Go up to the Edit tab and then down to Clear and click on it. Your white should have disappeared leaving you with a transparent middle.

41. Go up to the Selections tab and choose Select None. And we are done :) Save it as a .png file or .psp file to preserve the transparency in the middle.

TOU:

If you do this tutorial, your end result is yours to do whatever you wish; give it away as a freebie, use it as part of a kit, or sell it for profit. You may not make this into an action or script to give away as a freebie or to sell for a profit. A mention or a link back here would be appreciated but is not mandatory. Please do not share the supplies or tut through email or any other means. If you are using this or any of my tutorials for your groups or as part of your own tutorial, please post a link to the tut on my blog and let your members download the supplies from my blog for themselves.
 
posted by Scrap Stuff by Shawna at 11:41 AM | Permalink | 30 comments